

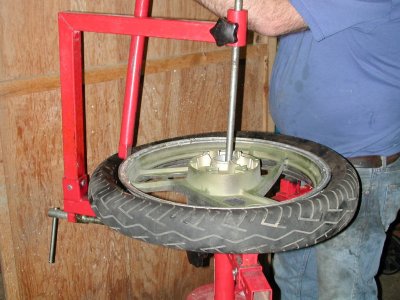
 Clamp the rim and insert the rod through the hub into the
hole beneath, then spray the bead generously with liquid soap ( diluted 1:4 ) or tyre lube.
Insert the flat end of the lever between the upper bead and the rim.
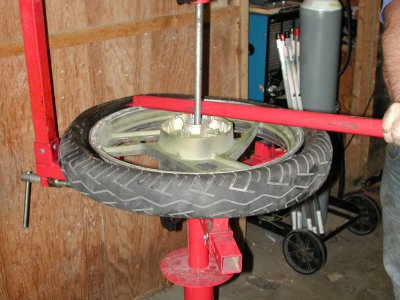 Lever the tyre bead off the rim and lay the bar flat across
the wheel, slide the bead off the rim by pivoting the lever on the rod.
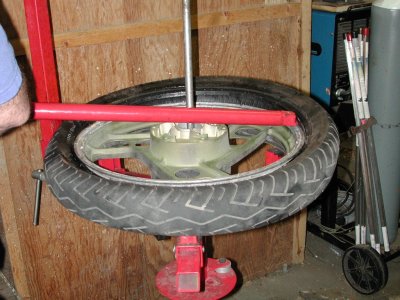 Continue around the rim until the top bead is off. Repeat with
the bottom bead.
Some tyres' lower bead will come off by hand after a little prying with the bar.
Remove the rod and the old tyre.
 Spray both beads with liquid soap (diluted 1:4) or tyre
lube, then shove the lower bead onto the rim. It will often go on with no tools, but a bit of
prying may be necessary. Pay attention to the arrow on the tyre. Line the painted dot on the
tyre sidewall up with the valve - this is the lightest spot on the tyre, and the valve is
presumably the heaviest spot on the rim. But not always.
Start the top bead by hand, then apply a small clamp to keep it from slipping off the rim. Or you can use a tyre iron with your third hand.
Hook the curved part of the knuckle end of the bar over the rim, pivot the bar on the centre rod, and work the bead onto the rim.
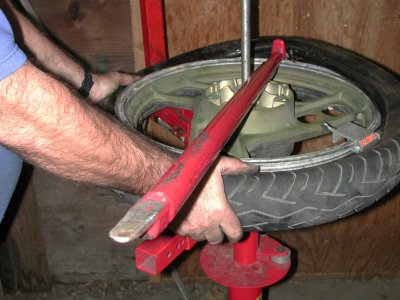 When the bead begins to be stubborn, stop and squeeze the
tyre, forcing both the upper and lower beads into the well of the rim. This will give you about
a half inch more slack.
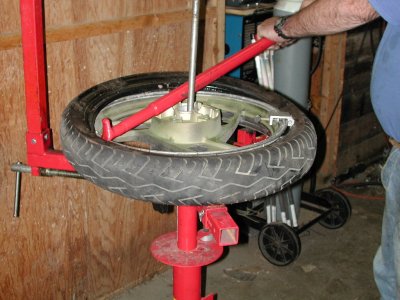
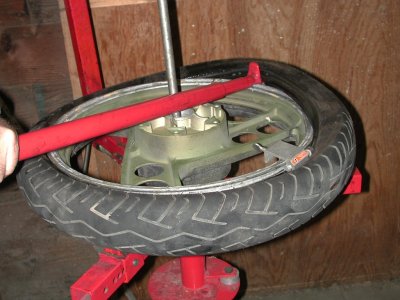 Continue around the rim with the lever. When it gets stubborn
at the last six inches or so, you can lift the end of the bar, forcing the bead down past the
rim edge with the flat tab you see sticking up in this picture.
Remove the wheel from the clamps before inflating the tyre or it'll grab the clamps and you can't get the wheel off them.
Seat the bead of the new tyre on the rim before installing the valve core - sometimes the core doesn't allow air into the tyre fast enough to inflate an unseated tyre.
Somewhere between 20 and 40 psi you'll hear two loud pops. That's the bead seating on the rim. This may not happen on tube-type rims, btw.
If you're using a tube, powder it (baby powder) before installation. Once the bead has seated, deflate the tyre and reinflate at least two more times to let the tube wiggle around inside the tyre until it's straight.
Most tyres should be balanced before installation on the bike. I use an A frame balancing stand, but it can sometimes be done on the bike if the brakes are removed to allow easy rotation of the tyre.

|
 |
|
|
|